SKYE User Guide
Connect the hardware
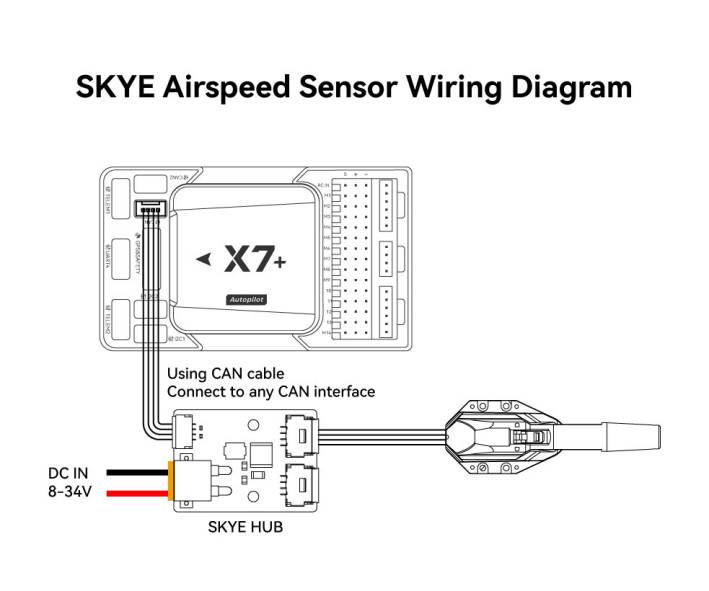
- Connect the SKYE HUB to the flight controller using the CAN cable;
- Connect SKYE HUB to 8~34V power supply (3~8s battery) use XT30 power cable;
- Connect the SKYE Smart Airspeed to the SKYE HUB using the airspeed cable;
Install to Plane/VTOL
In order to achieve IP44 protection level, it needs to be installed according to the following requirements. For conventional Plane/ VTOL,the following installation methods are recommended. The SKYE is mounted on the bottom of the wing, as shown in the picture below.
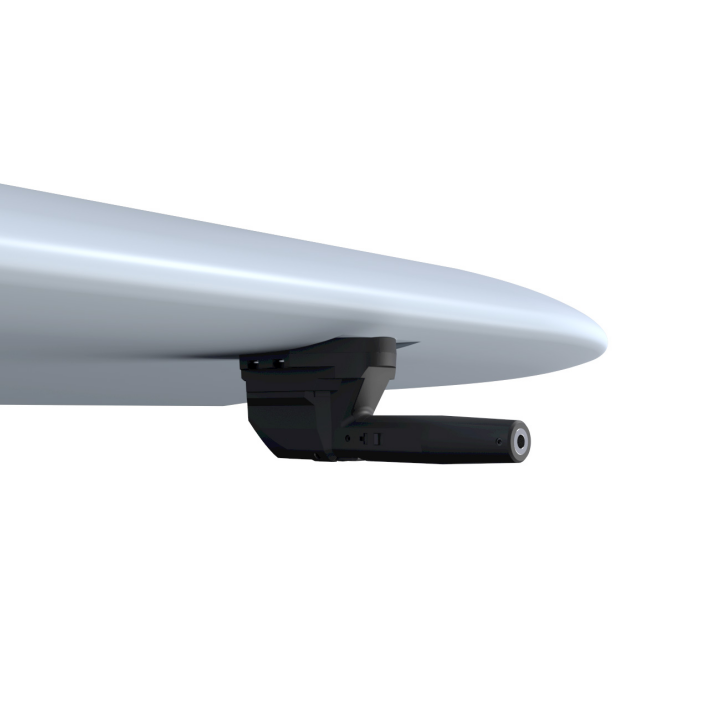
The rotation of the propeller will cause airflow disturbance, which will make the UAV obtain wrong airspeed data. It is forbidden to install the airspeed near the propeller.
Flight controller (ArduPilot firmware) parameter configuration
Run Mission planner>Configuration>All parameter table; set the following parameters and save and restart.
- CAN_P1_DRIVER=1
- CAN_P2_DRIVER=1
- CAN_D1_PROTOCOL=1
- CAN_D2_PROTOCOL=1
- ARSPD_TYPE=8
- ARSPD_USE=1
If you use AP4.30 or later firmware, you need to set the following parameters
- HYGRO_TYPE = 1(thermometer)
ArduPilot AP4.20 and above firmware supports SKYE smart airspeed.
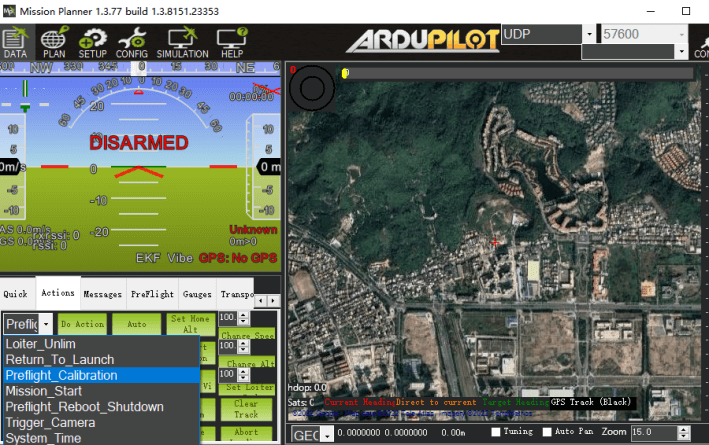
Airspeed offset calibration
After the SKYE smart airspeed meter is started, the temperature compensation function is automatically activated. For better performance, please wait for the device to heat up after starting it (the time is about 5 minutes). During the heating process, the sensor will have a certain airspeed offset. When there is no wind, the airspeed display is greater than 3m/s, please perform airspeed offset calibration before takeoff
Method:
- Place the pitot in a windless environment.
- Run Mission planner > Data > Actions
- Select "Preflight Calibration" in the first checkbox; click the "Do Action" button on the right.
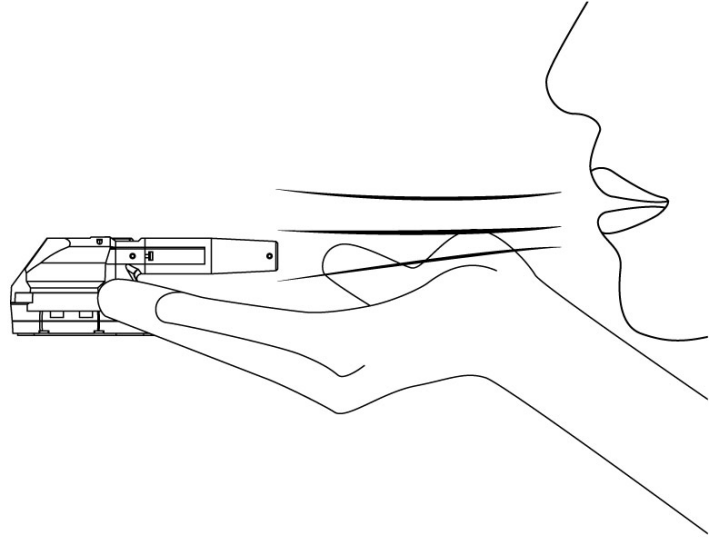
Preflight Airspeed Check
Please place the pitot tube in a windless environment to ensure that the airspeed value jumps within the range of 0~3m/s.
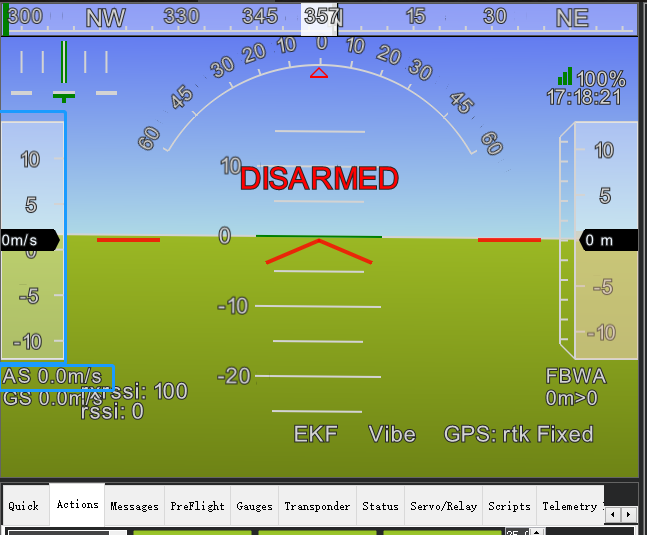
- Hold the pitot tube with your hand, blow air into the pitot tube, and check that the airspeed value can change according to the airflow speed, which means the inspection is completed.
Airspeed Calibration
The airspeed ratio of different installation positions and methods will be different, and the airspeed calibration needs to be performed on the first flight;
- Set the flight controller parameter ARSPD_AUTOCAL to 1 to enable automatic calibration. Start calibration For VTOL (choose one of the following two methods):
- Take off in QStabilize or QLoiter mode and convert to FBWA (self-stabilizing A mode) to control the drone to fly around 5 circles. After the ground station message bar prompts that the calibration is complete, perform landing. After the calibration is completed, set ARSPD_AUTOCAL to 0.
- If you do not fly in FBWA mode, you can fly with the airspeed meter enabled but the flight controller does not depend on the airspeed but on the airspeed (ARSPD_USE=1; ARSPD_TYPE=8; do not fly in a high wind environment This operation); use Loiter mode to circle about 5 circles after takeoff, the ground station message bar prompts that after calibration is completed, perform landing, and set ARSPD_AUTOCAL to 0 after calibration is completed.