Users guide for ArduPilot
The settings and configurations in this chapter apply to using the C-COMPASS with a flight controller running ArduPilot firmware.
Enable Compass
Run MissionPlanner and go to the Config > FULL Parameter List.
//If connected to CAN1
CAN_P1_DRIVER = 1
//If connected to CAN2
CAN_P2_DRIVER = 1
Missionplanner Compass Page Annotations
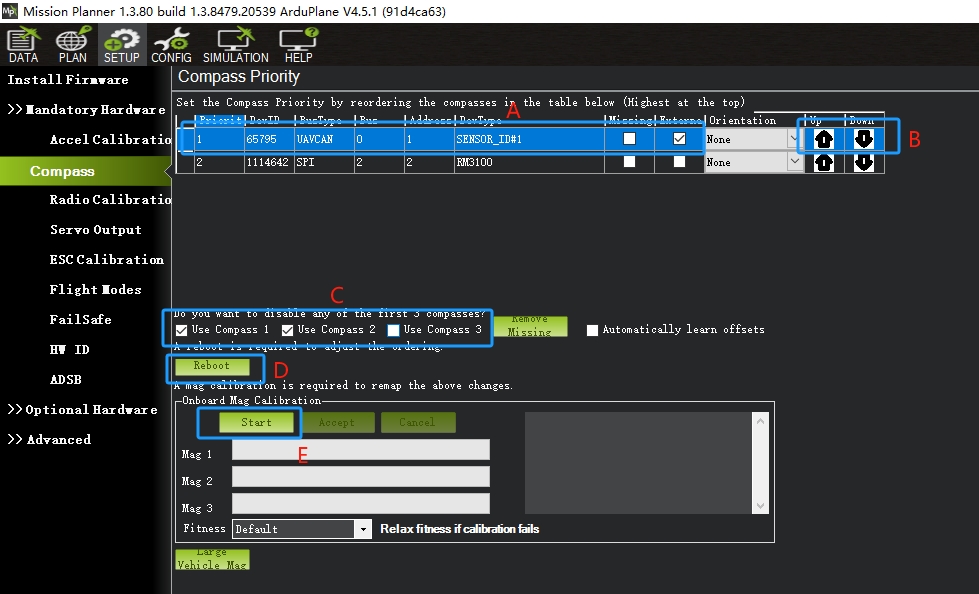
- A: Magnetometer information panel. For C-COMPASS, the BUS type is UAVCAN, Externa (external).
- B:You can adjust the order of the compasses by clicking on the up and down arrows, with the first one having the highest priority.
- C:Which magnetometers need to be calibrated (unchecked will not be used or calibrated)?
- D:After adjusting the order of the magnetometers, click on Reboot to restart the controller.
- E:Click on Start Compass Calibration.
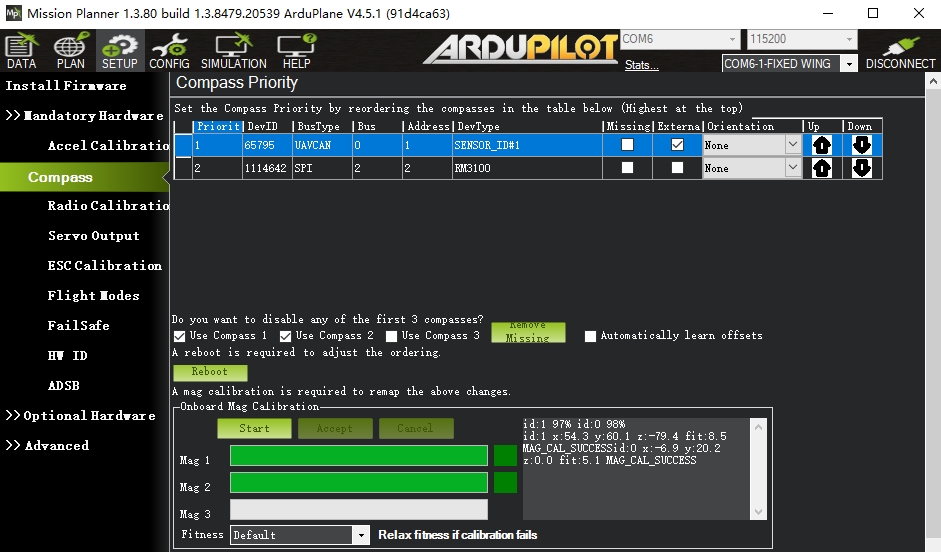
Execute compass calibration
- Click the "Start" button to begin the calibration process.
- Drive the vehicle in a "spherical" pattern until the calibration is complete.
- As shown in the diagram below, the system prompts that the calibration is complete.
[!TIP] To calibrate a magnetometer, install the controller and the magnetometer on the vehicle, and do not move them after the calibration is complete. For larger vehicles, it may be convenient to install robotic arms or wings to facilitate easy execution of the calibration (the compass should be far away from the arms or wings)