Skye2 NANO Quick Start Guide(ArduPilot)
The setup and configuration described in this chapter apply when using the Skye 2 NANO with a controller running PX4 firmware.
Enable
Run QgroundControl>, set the following parameters to save and restart the vehicle.
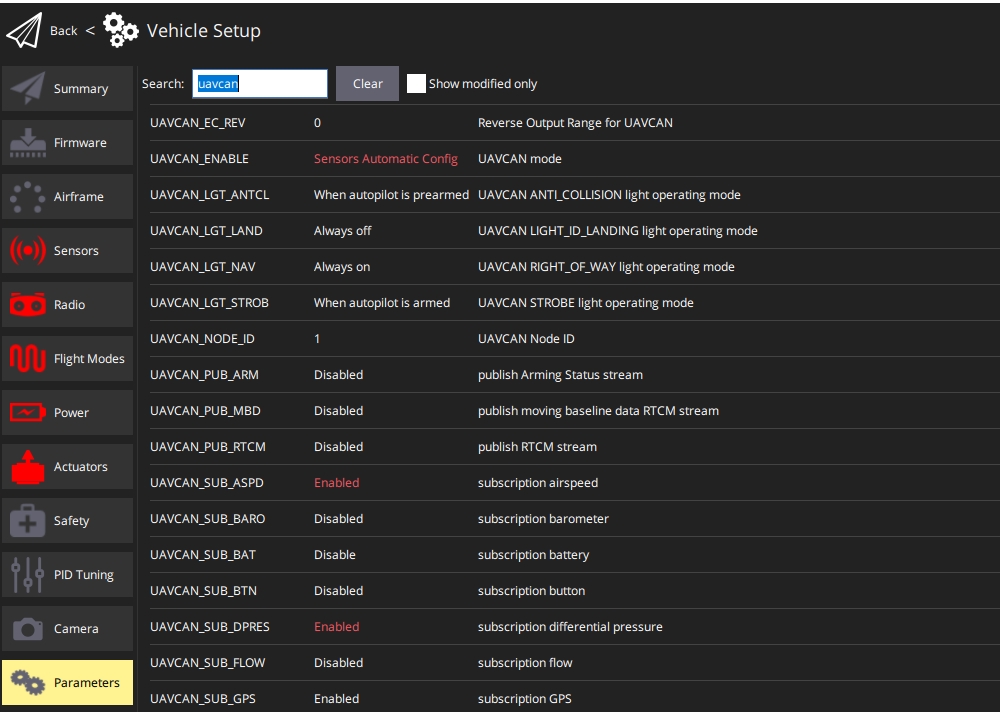
- UAVCNN_ENABLE Set to
Sensors automatic Config - Reboot
- UAVCAN_SUB_ASPD Set to
Enable - UAVCAN_SUB_DPRES Set to
Enable - Reboot
Multiple Airspeed Sensors
If you have multiple airspeed sensors then you can select which sensor is preferred as the primary source using ASPD_PRIMARY, where 1, 2 and 3 reflect the order in which the airspeed sensors were started:
- 0: Synthetic airspeed estimation (groundspeed minus windspeed)
- 1: First airspeed sensor started (default)
- 2: Second airspeed sensor started
3: Third airspeed sensor started
The airspeed selector validates the indicated sensor first and only falls back to other sensors if the indicated sensor fails airspeed checks (ASPD_DO_CHECKSis used to configure the checks).
The selected sensor is then used to supply data to the estimator (EKF2) and the controllers.
Performing the Calibration
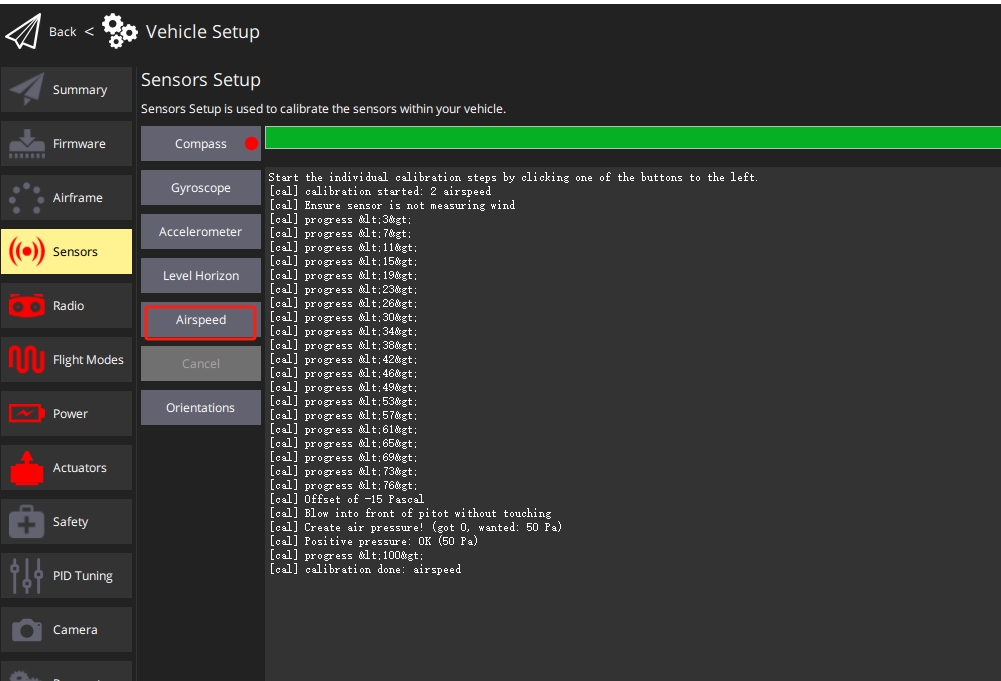
Select "Q" icon > Vehicle Setup > Sensors (sidebar) to open Sensor Setup.
Click the Airspeed sensor button.
Shield the sensor from the wind (i.e. cup it with your hand). Take care not to block any of its holes.
Click OK to start the calibration.
Once asked for, blow into the tip of the pitot tube to signal the end of calibration.
[!TIP] Blowing into the tube is also a basic check that the dynamic and static ports are installed correctly. If they are swapped then the sensor will read a large negative differential pressure when you blow into the tube, and the calibration will abort with an error.