PX4 Firmware Guide
This chapter will describe the Pixhawk V6X® guidelines for running PX4 firmware
Loading firmware
Pixhawk V6X® flight controller supports PX4. The following mainly explains how to load PX4 firmware.
[!NOTE] PX4 firmware 1.13.3 and above are compatible with Pixhawk V6X.
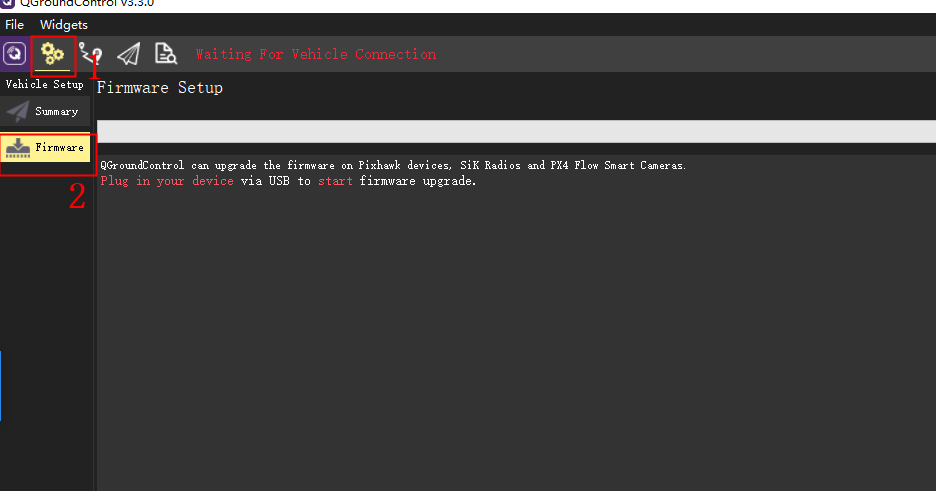
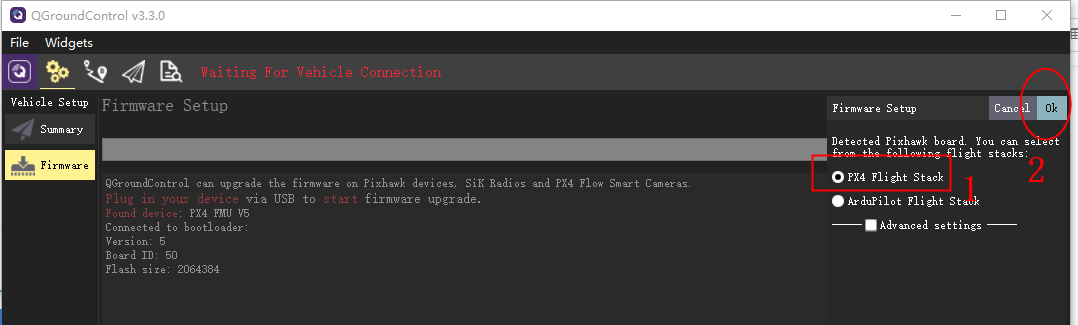
Write firmware online:
Connect the flight controller to the computer, open the QGroundControl ground station, click the setting icon > click firmware.
Connect the flight controller to the computer through the usb cable, the following window will pop up on the right side of the ground station "Select PX4 Flight STACK required" OK
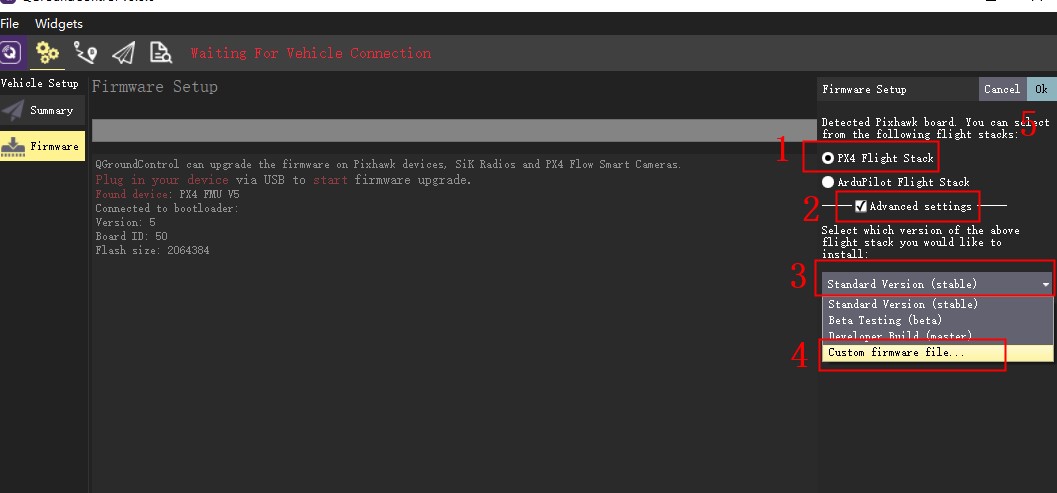
Write to local firmware:
- Download PX4 native firmware to local.
- Open the ground station > click the settings icon > click firmware
- Connect the flight controller to the computer through the usb cable, the following window will pop up on the right side of the ground station "Select PX4 Flight STACK required" Check advanced settings>custon firmware file "Find the downloaded firmware" ok
Serial Port Mapping
| UART | Device | Port |
|---|---|---|
| USART1 | /dev/ttyS0 | GPS |
| USART2 | /dev/ttyS1 | TELEM3 |
| USART3 | /dev/ttyS2 | Debug Console |
| UART4 | /dev/ttyS3 | UART4 & I2C |
| UART5 | /dev/ttyS4 | TELEM2 |
| USART6 | /dev/ttyS5 | PX4IO/RC |
| UART7 | /dev/ttyS6 | TELEM1 |
| UART8 | /dev/ttyS7 | GPS2 |
Building Firmware
[!NOTE] Most users will not need to build this firmware! It is pre-built and automatically installed by QGroundControl when appropriate hardware is connected.
To build PX4 for this target:
make px4_fmu-v6x_default
Debug Port
The PX4 System Console and SWD interface run on the FMU Debug port.
The pinouts and connector comply with the Pixhawk Debug Full interface defined in the Pixhawk Connector Standard interface (JST SM10B connector).
| Pin | Signal | Volt |
|---|---|---|
| 1 (red) | Vtref |
+3.3V |
| 2 (blk) | Console TX (OUT) | +3.3V |
| 3 (blk) | Console RX (IN) | +3.3V |
| 4 (blk) | SWDIO |
+3.3V |
| 5 (blk) | SWCLK |
+3.3V |
| 6 (blk) | SWO |
+3.3V |
| 7 (blk) | NFC GPIO | +3.3V |
| 8 (blk) | PH11 | +3.3V |
| 9 (blk) | nRST | +3.3V |
| 10 (blk) | GND |
GND |
For information about wiring and using this port see:
- PX4 System Console (Note, the FMU console maps to USART3).
- SWD (JTAG) Hardware Debugging Interface
Supported Platforms
Any multicopter / airplane / rover or boat that can be controlled with normal RC servos or Futaba S-Bus servos. The complete set of supported configurations can be seen in the Airframes Reference.
Power module
The autopilot includes a DroneCAN power module and battery monitor(CAN PMU lite),CAN PMU Lite connected to Power C1/PowerC2,set the following parameters:
- Connect to QGC Ground Station > Settings > Parameter Settings
- Set UAVCAN_ENABLE parameter to Sensors Automatic config
- Set the UAVCAN_SUB_BAT parameter to Enabled
- Write parameters and restart
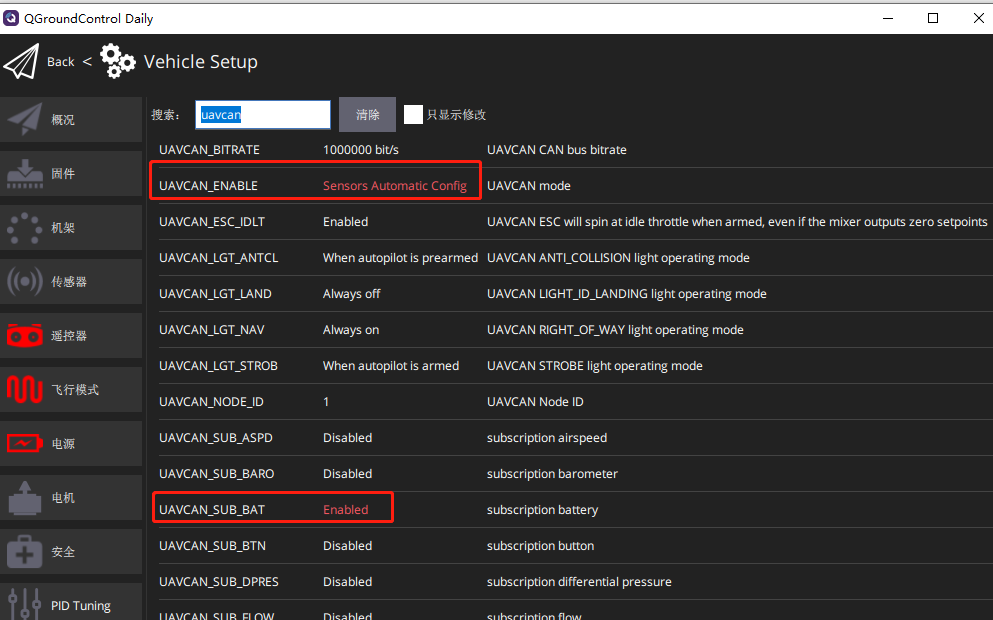
[!NOTE] When the Pixhawk v6x runs PX4 firmware, it does not support analog power modules such as HV_PM.
Ethernet Setup
I2C Protocol hardware
The Pixhawk V6X kit includes a UART->I2C cable and CAN/I2C interposer board for transferring I2C devices (e.g. MS5525 airspeed meter, LED status light, etc).