

Use Tutorial
Pinouts
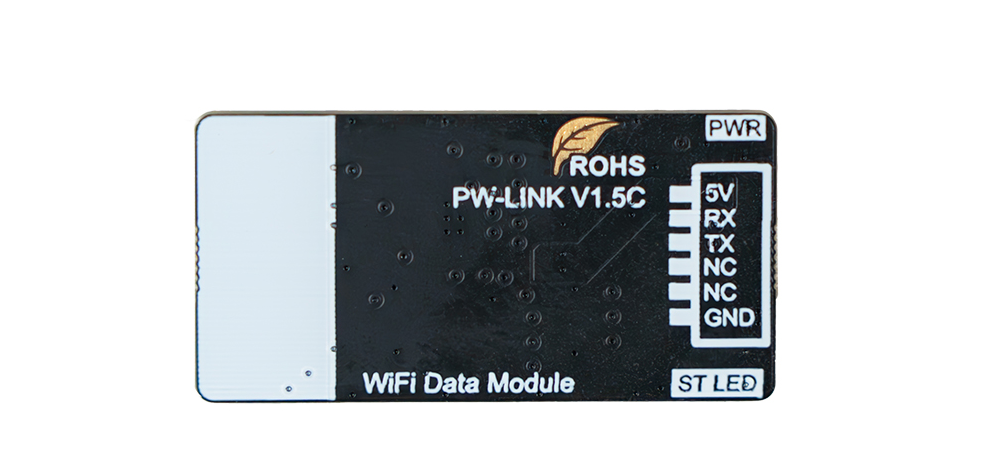
Hardware Connection
Use the dedicated cable to connect the PW-Link DATA lead to the controller's RADIO/TELEM port (radio RX to controller TX, radio TX to controller RX).
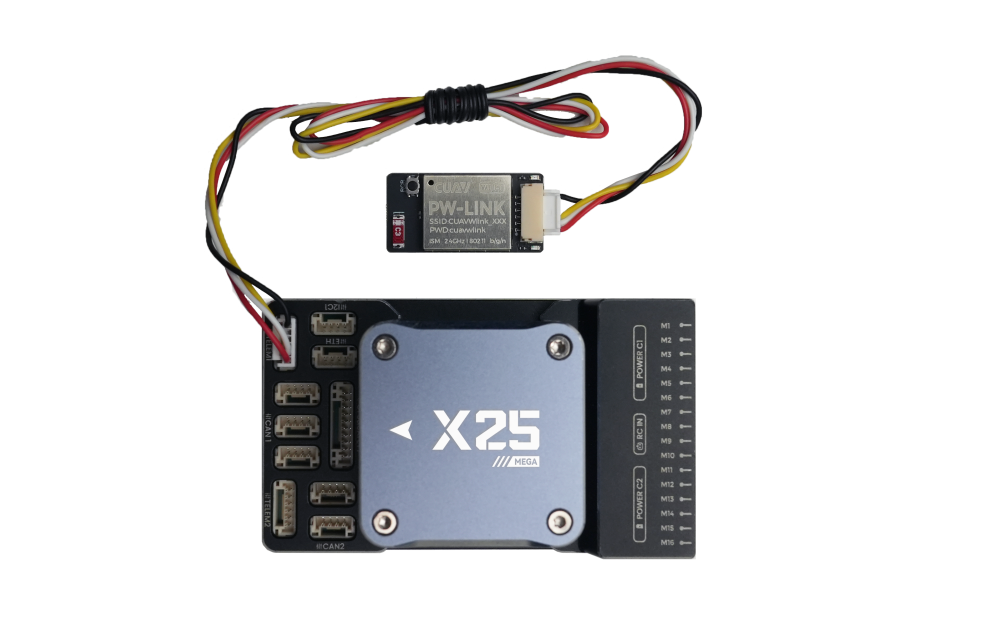
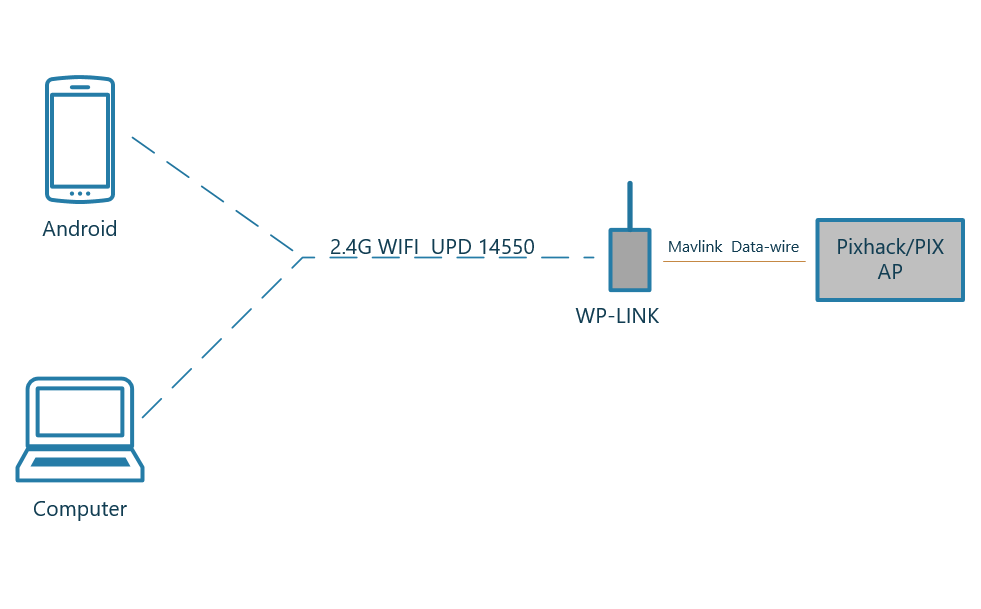
Connecting to Mission Planner
Connect the computer's wireless adapter to CUAVWlink_XXXXXX with password cuavwlink.
Open Mission Planner, select UDP in the upper right, and click Connect.
Enter 14550 in the port field and confirm.
Wait for data reception to complete.
No data received
If the computer is connected to the PW-Link network but Mission Planner receives no data, network permissions are usually disabled. Open Control Panel > Windows Firewall > Allow an app through Windows Firewall and enable all network permissions for MP.
Connecting to LGC/QGC
Connect the computer or phone to the PW-Link WiFi network CUAVWlink_XXXXXX with password cuavwlink.
Open LGC or QGC; the ground station connects automatically. Alternatively, follow the video below to add a UDP connection manually using port 14550.
Connecting with HFlight
HFlight is CUAV's official mobile ground station and works with all CUAV products: Download HFlight.
Confirm that the PW-Link is connected to the controller.
On the phone, search for WiFi networks and connect to CUAVWlink_XXXXXX.
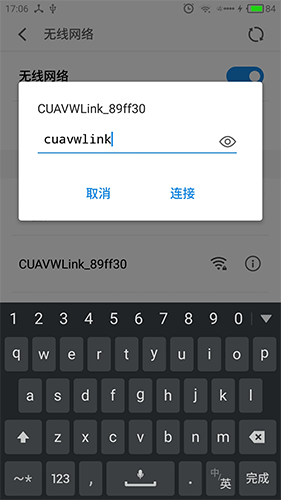
- Open HFlight and select UDP as the connection type.
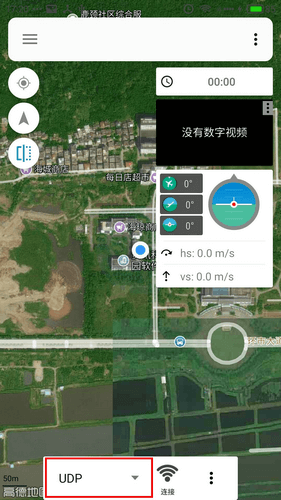
- Confirm that the UDP server port is 14550.
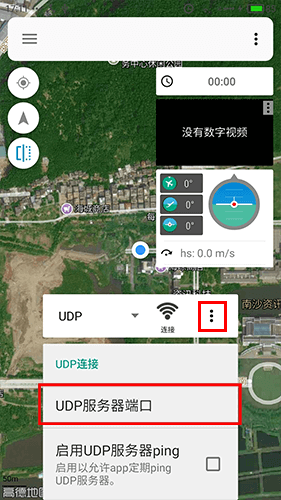
- Tap Connect. The data screen appears once controller data is received.
Changing Settings in HFlight
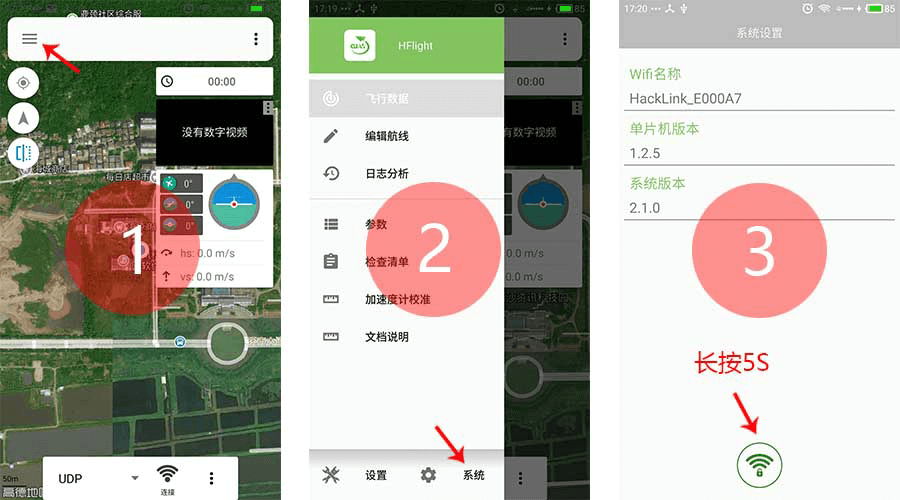
HFlight provides a PW-Link network settings window for changing the network name, password and channel, and for reading the version: open the HFlight side menu, tap the system button to enter settings, then long-press the network settings icon.
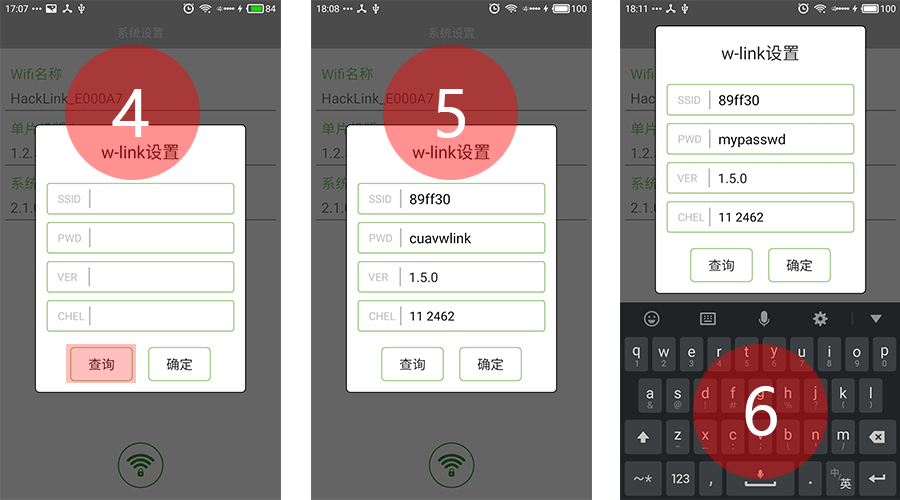
In the settings window, tap Query first to read the module's network information, then change the required fields.
Warning
Do not change settings while the unmanned system is in flight; communication may be interrupted.