
C-RTK3 X20P User Guide
This chapter applies to the scenario of using the C-RTK3 X20P with ArduPilot vehicles.
NOTE
ArduPilot 4.4.0 and later versions support the C-RTK3 X20P.
Setup as Rover (Air Side)
TIP
LGC ground station provides graphical configuration and hardware connection guidance for simpler setup. Before configuration, ensure the C-RTK3 X20P is in rover mode (MODE LED flashing green); you can also switch modes by long-pressing the MODE button.
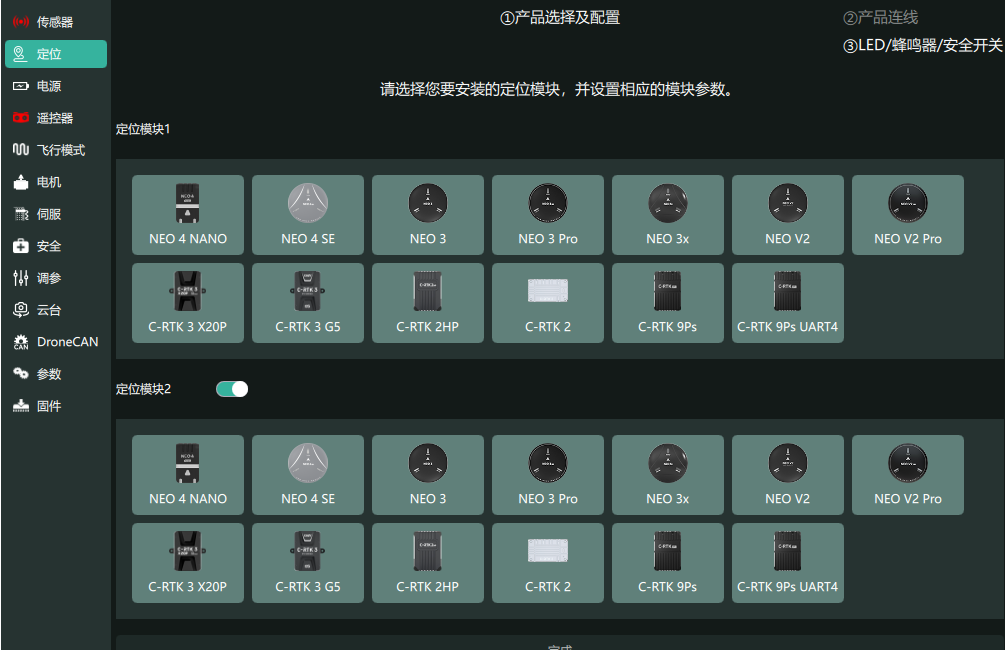
CAN Connection to Flight Controller
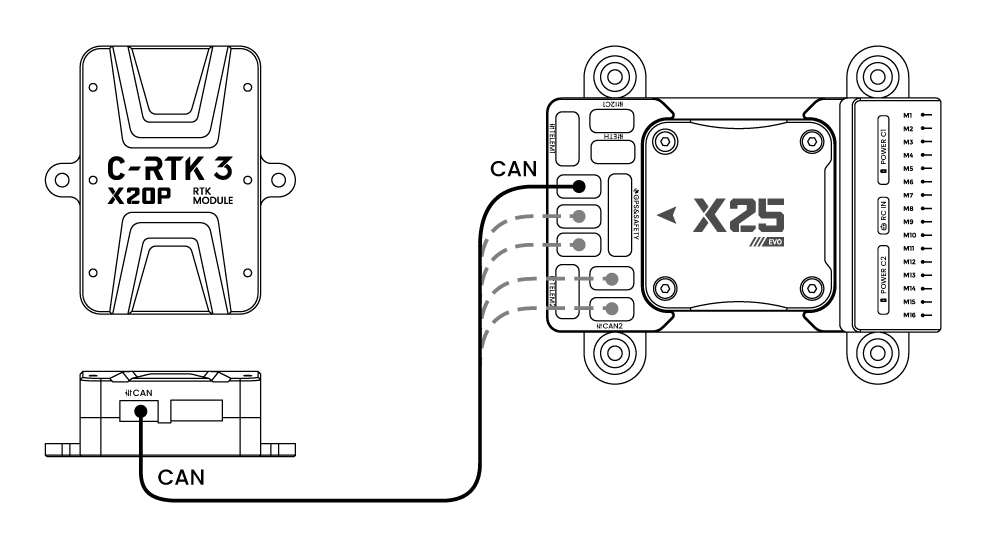
- Take out the CAN cable from the accessory package, connect the flight controller to the CAN port of the C-RTK3 X20P; install the antenna and ensure a clear sky view.
- Connect the flight controller to the ground station (such as Mission Planner / LGC) via USB.
- Enter the Full Parameter List, input parameter names in the search bar and set the following parameters.
// Mission Planner path: Configuration/Tuning → Full Parameter List → Search bar on the right
| Parameter | Value | Remark |
|---|---|---|
GPS1_TYPE | 9 | DroneCAN: 9; UART: 26 |
CAN_P1_DRIVER | 1 | Enable CAN1 driver |
GPS_AUTO_CONFIG | 2 | Auto configure DroneCAN GPS |
GPS1_POS_X | Value (m); set according to installation | Antenna X-axis offset relative to center of gravity, positive forward |
GPS1_POS_Y | Value (m); set according to installation | Antenna Y-axis offset relative to center of gravity, positive right |
GPS1_POS_Z | Value (m); set according to installation | Antenna Z-axis offset relative to center of gravity, positive below CG |
NOTE
The C-RTK3 X20P is a single-antenna positioning module and does not support dual-antenna heading. There is no need to configure antenna offset parameters.
For firmware versions below ArduPilot 4.6 (exclusive):
| Parameter | Value | Remark |
|---|---|---|
GPS_TYPE | 9 | DroneCAN: 9; UART: 26 |
CAN_P1_DRIVER | 1 | Enable CAN1 driver |
GPS_AUTO_CONFIG | 2 | Auto configure DroneCAN GPS |
GPS_POS1_X | Value (m); set according to installation | Antenna X-axis offset relative to center of gravity, positive forward |
GPS_POS1_Y | Value (m); set according to installation | Antenna Y-axis offset relative to center of gravity, positive right |
GPS_POS1_Z | Value (m); set according to installation | Antenna Z-axis offset relative to center of gravity, positive below CG |
Positioning Verification
- GPS positioning data can be viewed in the status bar of the Mission Planner flight data toolbar.
- Check whether the positioning status is RTK Fixed.
- Observe the satellite count, HDOP value, and other indicators to confirm good positioning quality.
NOTE
For RTK positioning, ensure the base station is functioning properly and the data link is working.
UART Connection to Flight Controller
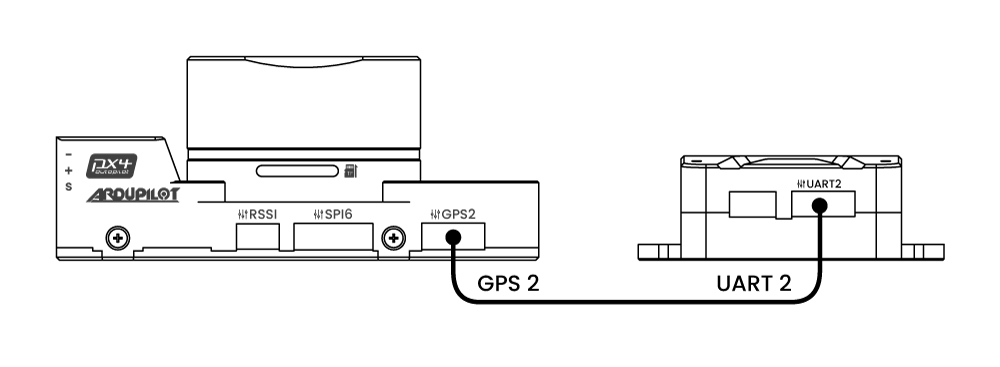
| Parameter | Value | Remark |
|---|---|---|
GPS1_TYPE | 1 | DroneCAN: 9; UART: 1/2 |
GPS_AUTO_CONFIG | 0/1 | Auto configure serial GPS, For AP firmware below 4.8.0, disable auto config |
GPS1_POS_X | Value (m); set according to installation | Antenna X-axis offset relative to center of gravity, positive forward |
GPS1_POS_Y | Value (m); set according to installation | Antenna Y-axis offset relative to center of gravity, positive right |
GPS1_POS_Z | Value (m); set according to installation | Antenna Z-axis offset relative to center of gravity, positive below CG |
SERIAL3_PROTOCOL | -1 | Disable Serial3 if no GPS is connected to GPS&Safety port; GPS2/UART4 will be recognized as GPS1 |
SERIAL4_PROTOCOL | 5 | Set Serial4 as GPS port, generally no modification required |
SERIAL4_BAUD | 230400 | Set Serial4 baud rate to 230400 |
Setup as Base Station
TIP
Use LGC ground station for automated base station configuration. QGC does not yet support C-RTK3 X20P, and Mission Planner cannot configure the base station convergence accuracy and duration.
- Connect the C-RTK3 X20P to your computer via USB cable.
- Confirm the C-RTK3 X20P is in base station mode (MODE LED solid green; long-press the MODE button to switch modes).
- Launch LGC ground station. When the RTK satellite icon appears, the X20P base station has been recognized.
- When the satellite icon shows RTK in red, and the status displays Converging, the RTK base station is performing survey-in convergence positioning.
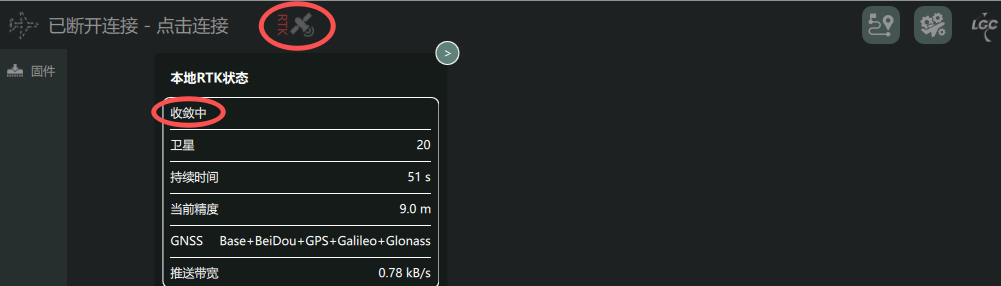
- By default, the convergence accuracy is 3.0m with a minimum duration of 30s.
- When the convergence accuracy and criteria are met, the RTK text turns white. The status displays RTCM transmitting, indicating base station configuration is complete; the ground station will send differential data to the controller/RTK rover.

NOTE
The convergence accuracy can be configured — higher accuracy requires longer convergence time. Under default settings (3.0m accuracy), after the rover resolves, centimeter-level positioning accuracy can be achieved.
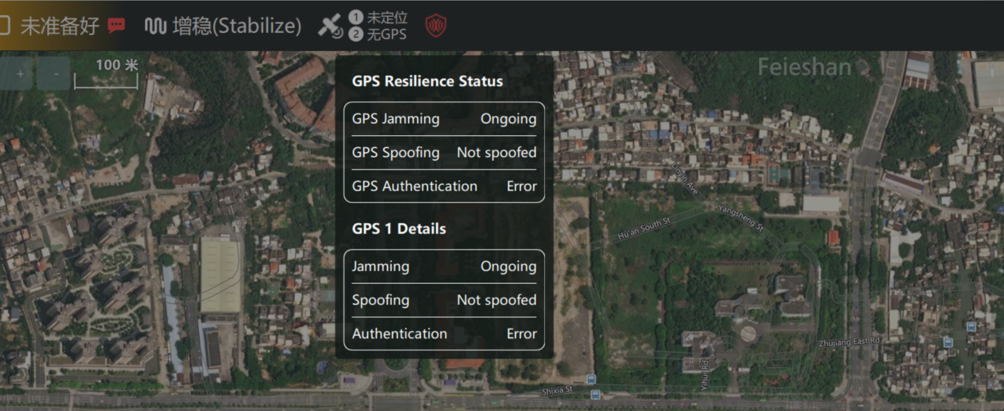
Interference Status Display
NOTE
The C-RTK3 X20P supports interference status display with built-in CW interference detection and spectrum analysis; this requires compatible flight controller firmware and ground station support. Please contact CUAV technical support if needed.