

Connect Windows PC
summary
Because of the drive and ground station, the current computer only supports Windows XP / Windows 7 / Window 10 operating system, it is recommended to use Winwdows 10 / Windows 7 This chapter focuses on the use of Mission Planner to connect ONE BOX data and video streams. The operation and use of the ground station is not in this section. If you need to know the detailed usage of the ground station, please visit http://doc.cuav.net/PixHack/copter/first-setup/connect/mission-planner.html
Driver and Software Installation
You can visit here for detailed tutorials http://doc.cuav.net/PixHack/copter/first-setup/software-installation.html
The FTDI drive is automatically installed when the ground station is installed
USB Hub and UVC drivers are system-independent and drive-free
How to use
Power up the aircraft's equipment (aircraft control, SIK data transmission, 5.8G transmitters, AV cameras, etc.)
Use the standard Micro USB cable to plug in the computer and ONE BOX
After the ONE BOX is turned on, select the PC icon and press OK
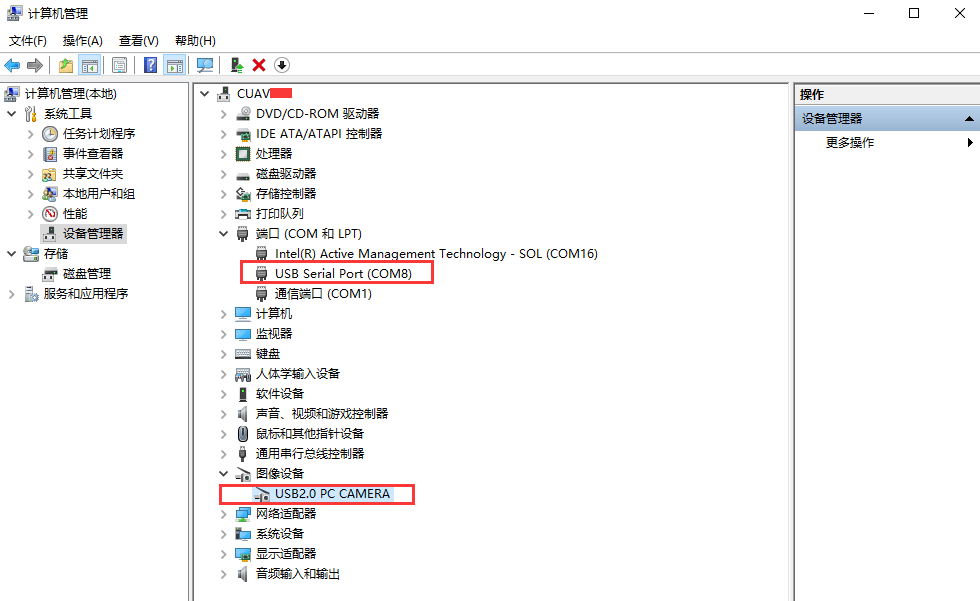
Device Manager should appear below the device
5.Open the mission planner ground station >> configure / debug >> planner video equipment, choose USB 2.0 CAMERA, click the start, return to the flight data interface to see the video
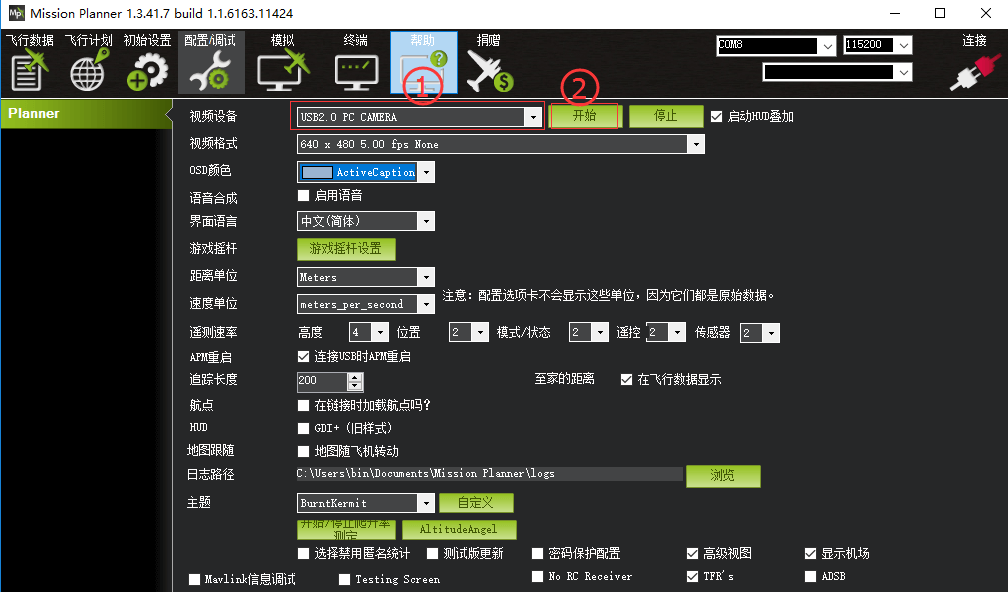
Then select the port COM8 of the ONE BOX (see the Device Manager for the specific port number, each computer is different).
After the accidental connection is successful, the HUD window can achieve the superposition of gestures and data.